Hello, friends! If you’re a writer who hangs around on social media, no doubt you’ve heard the term novel aesthetic bandied about by other writers. When I first started on Twitter, I’d see hashtag games asking writers to share an aesthetic, and then a whole string of tweets full of gorgeous pictures. But what is an aesthetic? And how on earth does an average Word-competent writer create one??
If you look up the definition of aesthetic, it means: 1) adj. concerned with the appreciation of beauty, and 2) n. a set of principles underlying and guiding the work of a particular artist or artistic movement. In writer-lingo, an aesthetic is an image or set of images that evokes the mood or themes of their work. It might represent an entire novel, a single character, or some other facet of the story.
A well-done aesthetic is a beautiful thing to behold–just scroll through a few on Twitter and you’ll want to read every single book you see. After all, a picture is worth a thousand words. (*And we’ll be covering how to avoid cliches in writing another day…*) So, if you want an extra way to hook potential readers beyond your excellent prose, it’s worth learning how to create your own aesthetic.
When I first saw all the lovely pictures on Twitter, I had no clue how to create one. Bear in mind that while reasonably competent at using a computer, I’m certainly not tech-savvy. Nor am I remotely good at interior decorating. All of my creative juices seem to channel into imaginary worlds and writing, not art. But after doing some research and some trial-and-error, I’ve figured out the basics to build a good aesthetic.
Disclaimer: I don’t own the rights to any of the original images used in this blog post–they’re taken from Pinterest.com, solely for the intent of instruction. Please make sure to follow copyright laws on any images you use.
Legal stuff aside, let’s get to it!
1. Create a Pinterest storyboard.
Aesthetics are made from photographs and other artwork. Unless you happen to be a photographer or artist, you’ll need to find your images online. There are plenty of options out there, but I’ve found the easiest to be creating a board on Pinterest. Head to pinterest.com, set up a user account for yourself, and start a new board for each WIP. When you’re on one of your boards, you can search for new images using the search feature at the top of the page.
Look for images related to your characters, different settings in your story, quotes or lines of poetry, animals, weapons, etc.
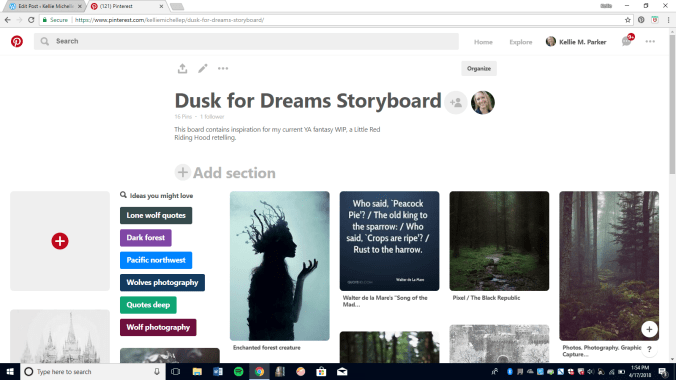
Here’s an example–a screenshot of my storyboard for Dusk for Dreams, that WIP I’m supposed to be drafting eventually. Note the “Search” function at the top. It takes me a long time to find images I like, so I try to start my storyboards early on in the writing process and add to them periodically.
2. Create a Canva account.
Now that you have a pool of images to use, it’s time for the aesthetic magic. I’m sure there are numerous programs you could use, but I’ve found Canva to be pretty user friendly (and free!). To get started, head to canva.com and create a user account.
Here’s a screen capture of my Canva page:
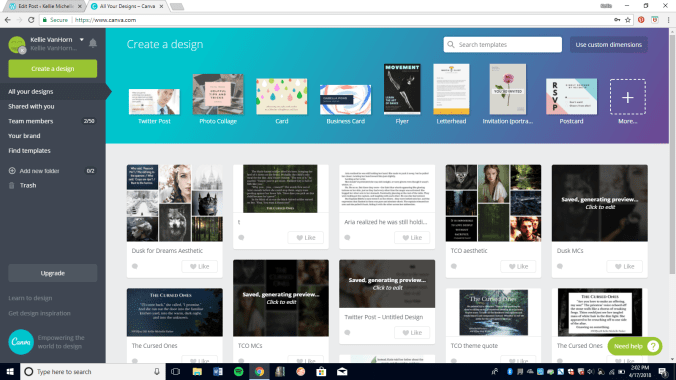
At the top, you can select a design to create. The new project will open in a new tab. This main page also shows your previous projects saved to Canva. These can be shared with anyone you choose via e-mail, or you can share your work to social media. You can also download projects to your hard drive.
Note (yes, again, because it’s that important): It’s important to remember copyright issues as you work with other people’s images. It seems to be fair game to share images on social media that belong to others (although it’s good form to give credit where you can), but you shouldn’t print/ reproduce anything you create on Canva unless you own the rights to the pictures. Alternatively, you can find plenty of royalty-free stock images on pixabay.com and pexels.com.
3. Start a design.
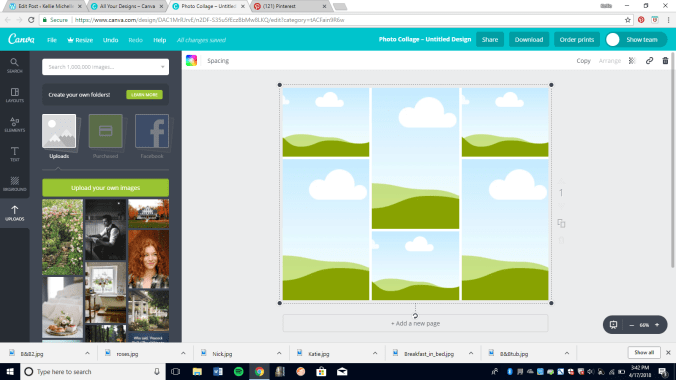
If I’m making an aesthetic, I usually select “Photo collage.” When the new tab opens, it will look like this:
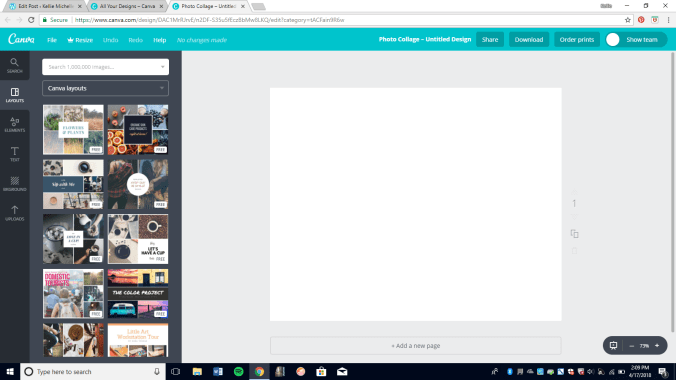
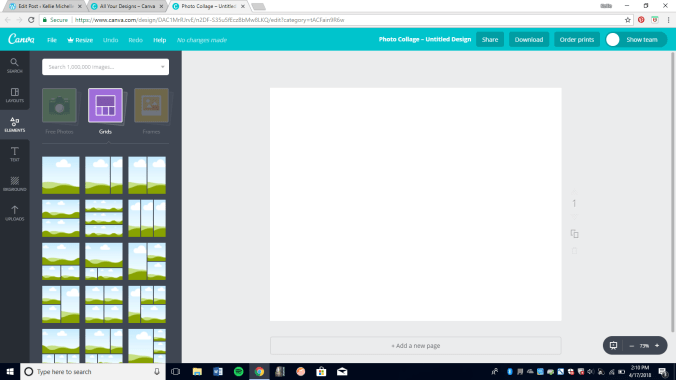
You can select one of the available Canva layouts if you see one you like. These give you the option to enter your own text and swap out images. However, if you want more images or more choices, select “Elements” from the taskbar on the left. From there, choose “Grids”–a new assortment of options will open up, like so:
4. Build your aesthetic.
First off, before choosing which grid you want, take a look at your Pinterest storyboard and think about what images you’d like to use. If I’m creating an aesthetic to go along with a story pitch, I try to include images for the main characters, possibly the antagonist, and at least a few for the setting. Maybe a quote, a tagline, or the title also.
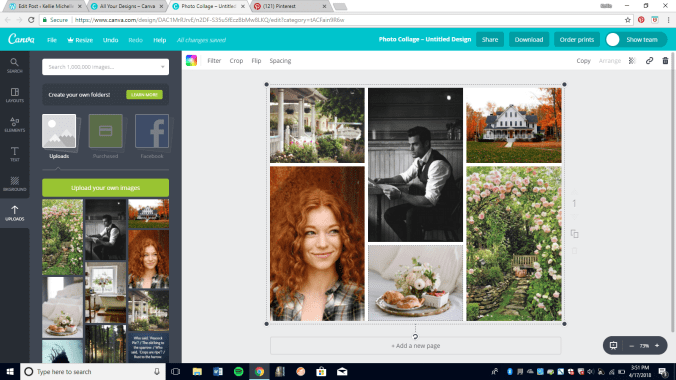
Take a look at the shapes of the pictures you want to use, as well as how many, and then choose the grid that will work best with what you have in mind. For the sake of this post, I’ll make an aesthetic for my contemporary romance WIP, The Inn at Mill Creek. Here’s the grid I’ve selected:
Now, for the images. On your Pinterest board, select the image you want, right click on it and “Save image as” on your hard drive. Then go back into Canva and choose “Uploads” on the left-hand taskbar. Click “Upload your images” to add the files from your computer. On the screenshot above, you can see I’ve already added the images I want to use for this aesthetic.
5. Play with the images to create the effect you want.
Now, for the fun part. You can drag and drop the images you’ve uploaded into the grid you selected. Not fitting the way you want? Pick a different grid.
By double-clicking on an image in the grid, a new window will open that allows you to re-position the image. Sometimes it can be more effective to use part of an image rather than the whole thing. Play around with different arrangements to create the look you want. Some people prefer aesthetics in black and white, others like lots of color. I find it works well to keep a few main colors and try to balance them in the image. It might take a while to get just the right look.
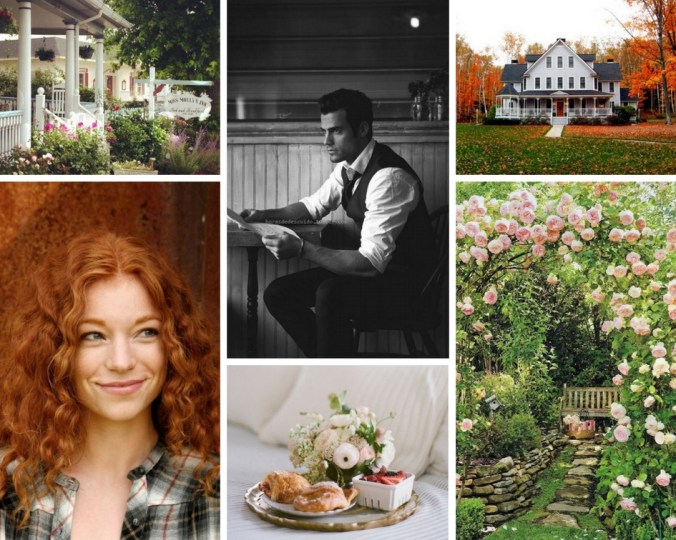
Here’s what I’ve got so far:
Overall, I’m pretty pleased with this effort. I’m not wild about the black & white photo, but it’s the best one I could find for Nick, my male MC. I like how the orange fall leaves balance Katie’s red hair. The flowers and pastries represent her love of gardening and baking, and also balance each other nicely. They also help bring the bed and breakfast setting to life. Together the pictures evoke a sort of cheerful restfulness, which works well for this story (at least until Nick enters the picture…).
Notice I didn’t add in the book’s title or any quotes, but I could delete one of the images, color in the square, and insert a text box. Or I could find an image quote to use from Pinterest.
6. Share your work.
If you look at the Canva toolbar at the top of the screen, you’ll find the option to “Share.” Clicking this button opens up a window allowing you to type in an e-mail or you can share directly to social media. Alternatively, select “Download” to save the image to your hard drive. You can then insert the image into whatever social media format you’re using.
If you’ve created something with images you own the rights to, you can use the downloaded work however you wish. E-book cover, bookmarks, promotional materials, you name it.
Examples
Here’s the aesthetic I just made for The Inn at Mill Creek:
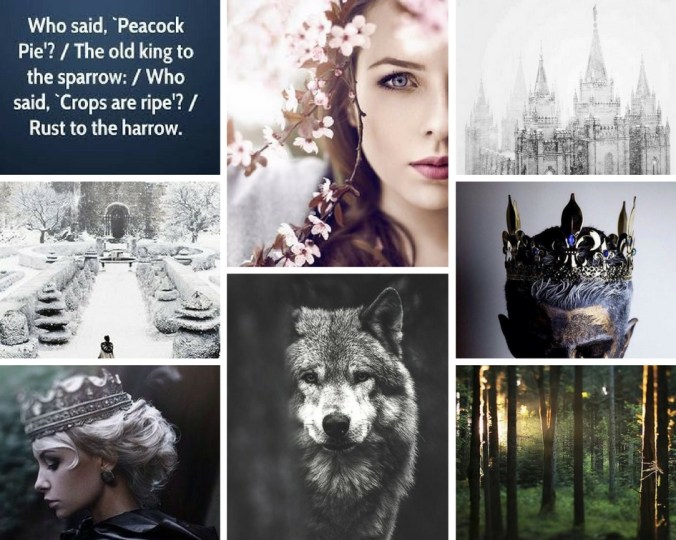
And another, for the fantasy WIP I’m outlining called Dusk for Dreams (you saw that storyboard up above on step #1). Notice I used text in this one (from a Walter de la Mare poem). I have another black and white image, along with sort of a white/ blue theme with hints of green. This aesthetic has a very different feel or mood than the one above, which is good, because they’re very different stories.
Interested in reading either of these now? 🙂 There’s nothing quite like a good aesthetic to make a story come to life and to set one’s imagination in motion!
If you’re feeling inspired to try one yourself, go for it. It isn’t as hard as I thought the first time I saw everyone else’s on Twitter. Feel free to ask if you have questions, or share a link to your aesthetic!
Image credits: Header image from pexels.com, CC0 license. Other images from pinterest.com.

Love love love this! I always have a Pinterest board for my stories, but I’ve never put the top images all in one place, so they’re always a bit messy and useless, really. More stored in the back of my head type things than anything I could market or use online. Such a useful guide. Thanks so much!
LikeLiked by 1 person
Thanks, Audra! I’m just happy to be able to share something I’ve learned along the way. 🙂
LikeLike
Pingback: Flash drives float, Fun at the beach, and other inspiration from Dragonspire! – The Dragonspire
Pingback: Interviews from the Void: Episode #32 - Kellie Parker - Arthur Macabe's Strange World
Pingback: Pre-planning Your Novel with Pinterest and Excel | Kellie Michelle Parker
Pingback: How to Design a Novel Aesthetic with Canva – Erin Fulmer Writes SFF
Pingback: Use Color Theory To Improve Your Writing | Writer’s Relief - On9Income
Pingback: 10 Childhood Writing Prompts | Jessica Sherry